A Tutorial on how I made my Tauriel traveling cloak.
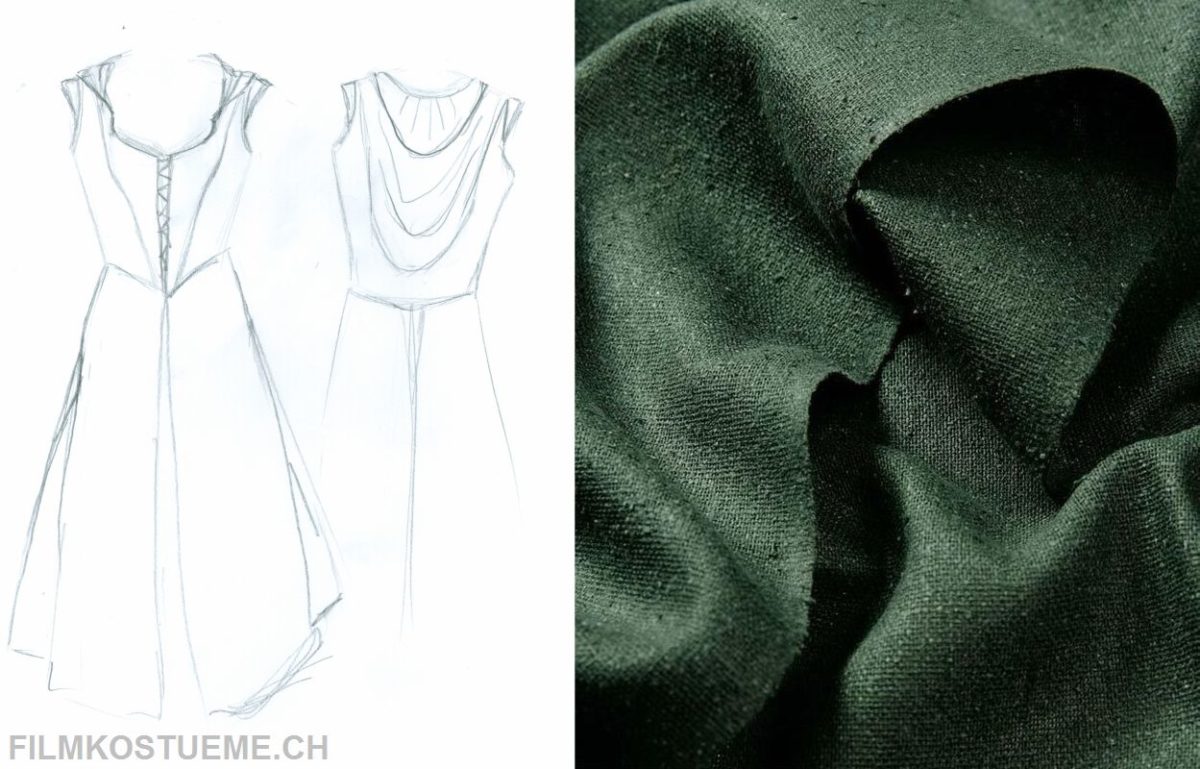
Pattern & Fabric
Here's my pattern for the cloak. The hood will come later, that's why it's missing 😉


The fabric I bought was to dark for my linking. As it was otherwise a beautiful raw silk, I couldn't bring myself to not use it...dilemma... 😉 So here's what I did, I bleached it with javel in my bathtube. And luckily it worked quite well 🙂 I don't recommend using the washing machine for that. Done that before and the result was awful! Also first test on a smal sample, so you don't ruin the whole fabric. Here's before and after....


Mockup
I always do a pattern test/mockup before actually cutting the real fabric.
I was pretty happy with how it turned out and didn't have to change much 🙂


The Bodice
After testing my pattern I started with the bodice.
As my raw silk was very thin and light, I had to stiffen it up a bit. I ironed on an interfacing for starters.

As you can see the bodice is still very saggy, so I mady a base for it and added some boning. I made the base from my pattern test, by the way. Love recycling 😉


Then I put the layers together et voila, it looked much better!


Piping & Hood
As you can see in the picture of the original costume, there is a thin piping around the edges of the bodies (also on the hem of it)
Here I prepare my piping:


And here already pinned around the edges and ready to be sewn.

And the finished edges.

A few notes on the hood:
For the lining I used the same fabric, but bleached it some more, so that it's slightly lighter then teh rest of the cloak. I think it gives a nice effect 🙂


The Linging
I knwo maybe not the moste exciting part, but still pretty important in the costume process.
Here I'm cutting the the facing (I ironed on some light interfacing for the skirt facing and stiffer interfacing for the bodice ones) and the lining fabric.


The complete bodice lining. Before sewing it to the bodice.


And the lining for the skirt part. I still had to hand sew the hem facing and then hand sew the lining to it.
The Closure
I went shopping for a matching satin ribbon and this is all I found:

I wasn't happy with it at all.... it was far to bright and light. So I trided to dye it.
Well that wasn't so easy, I had to use a lot of black and brown acrylic paint with a smal amount of water untill I got a result.
At first I used to much water and the color wouldn't change at all...
Below you can see the color bath and the ribbons hanging from a hanger to dry.


A before & after picture. Still not exactly what I wanted, but much better 😉
For the loops I used the same ribbon, only folded in half and sewn together.
First I pinned it in place and then sewed it on.


And that's my final result....
......ah well, okay not quite final 😉 I didn't really like the result. The ribbon was to wide for my linking, so I sewed it in half as well. Now I'm satisfied with it 🙂

Final Steps
Finishing up the bodice lining:


Edging the armhole: First I cut away the extra fabric around it, then I pinned and sewed the bias strip to it and finialy sewed the strip around the edge.


Cutting and sewing the shoulder flaps


Pinning the flaps to the armhole and then first sewing it down from the left side and then from the right side and tada the flaps are done 😉


Adding closure hooks to the bottom of the bodice front and to upper skirtpart front


Side slit seam, done by hand

And then finally attaching the skirtpart to the bodice


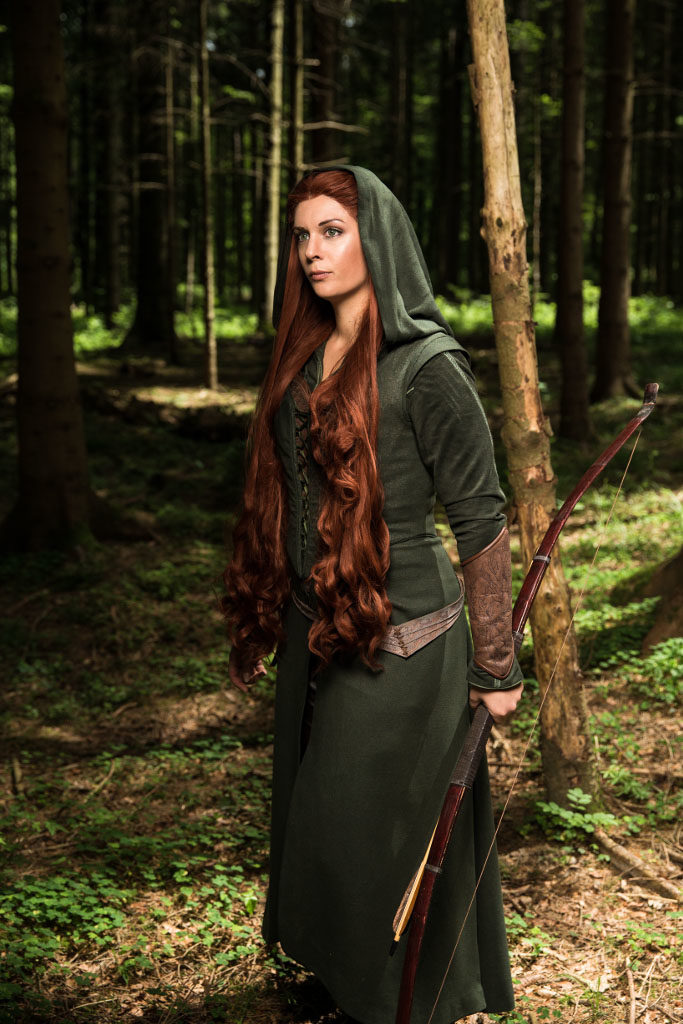
Finished traveling cloak
Some pictures of the finished cloak 🙂


That's it for Tauriels traveling cloak. I hope you found my tutorial helpful. Please feel free to share it.
If you have any question, leave me a comment.


I admire your great talent!
Thank you for every suggestion, I’m at the beginning of my sewing Tauriel costume.
Elisa
Hi Elisa,
you’re very welcome 🙂 I’m glad my post was of help to you!
Have fun with your Tauriel costume.
Sarah
It’s really an amazing work !
I’m a beginner in costume so your post is very helpful. I started my costume this week and I was wondering where and how you sewed the skirtpart to the bodice ? because we don’t see any sewing on the bodice 😉
Tess
Thank you Tess 🙂
I only sewed the skirt part to the inner layers of the bodice, so you can’t see the stitching from the outside. hope that helps 🙂
Sarah
that’s really helful thank you 🙂
You’re very welcome 🙂
Hi,
Could you maybe also do a tutorial on how you did Tauriels green travel dress? The one under the traveling cloak? I cannot find a good tutorial on how to do the pattern and yours looks really close to the original.
Greetings, a fellow cosplayer,
Julia 🙂