This is how I made Tauriels corset and bracers for the Mirkwood outfit. Hope you like it and find it helpful 🙂
Pattern & Mock up
The base of every project is a good pattern. Here's my pattern for the halfcorset and the bracer.

As always I did a mock up first, to see if the pattern needs some changes. Whenever I can, I look to it, that I can reuse the fabric for my mock up later in the real deal. i.e. for the base of the coset.


Fabric Layers
I used quite some different fabric layers for both corset and bracers to achieve the right look.
At first we have the base a cotton denim (the fabric I used for my mock up 😉 ).
For the corset a added boning to give it some extra hold. You won't see this layer at all (except from thie inside)
Second layer is this gray-olive layer, it's a faux suede fabric I hade in my remnants.
You won't see too much of that layer eighter.

Now it get's more interesting 😉
The third layer is this silver net fabric.
I wanted to add tiny bit of sparkel to it. But the silver was to bright, so I painted it over with brown acryllic paint to tone it down.


And these are the three layers joined together 🙂

Leather Layer
Ontop of the fabric layers there's another one. The leater leafs.
I had to improvise with the leaf design on the bracers and the corset, because there aren't any good pics, especially of the corset. So here's my interpretation of the design 🙂


Then I cut the whole leaf pattern thingy out. For the little holes in the leafs I used a cutter.

Next stept was transfering the pattern onto thin leather. I originally was going to use faux leather, but was adviced against it 😉
I was pretty happy, because I realized I still hade some leather left from my other Tauriel corset. I admit I had completely forgotten about it.... And I had just enough left for the leafs. Yay 😀

Once all the leather leafs were cut out, I pinned them into place.
OMG my wrist did hurt so much after all the cutting... but well it was so worth it 😉

Once all the leather leafs were cut out, I pinned them into place.
OMG my wrist did hurt so much after all the cutting... but well it was so worth it 😉

Here I'm sewing down the leather (using the ziczac stitch)
I did that on all the edges, but not in the smal holes of the leaves. As far as I could see it was done like this in the original as well.
With this top layer it looked like this and I was very happy with it 😀

Leather Edges
After the leaf decoration, I added some leather stripes to the seams.

Then I sewed everything together with the base layer and did the edging with a bias stripe to prevent the edges from fraying.


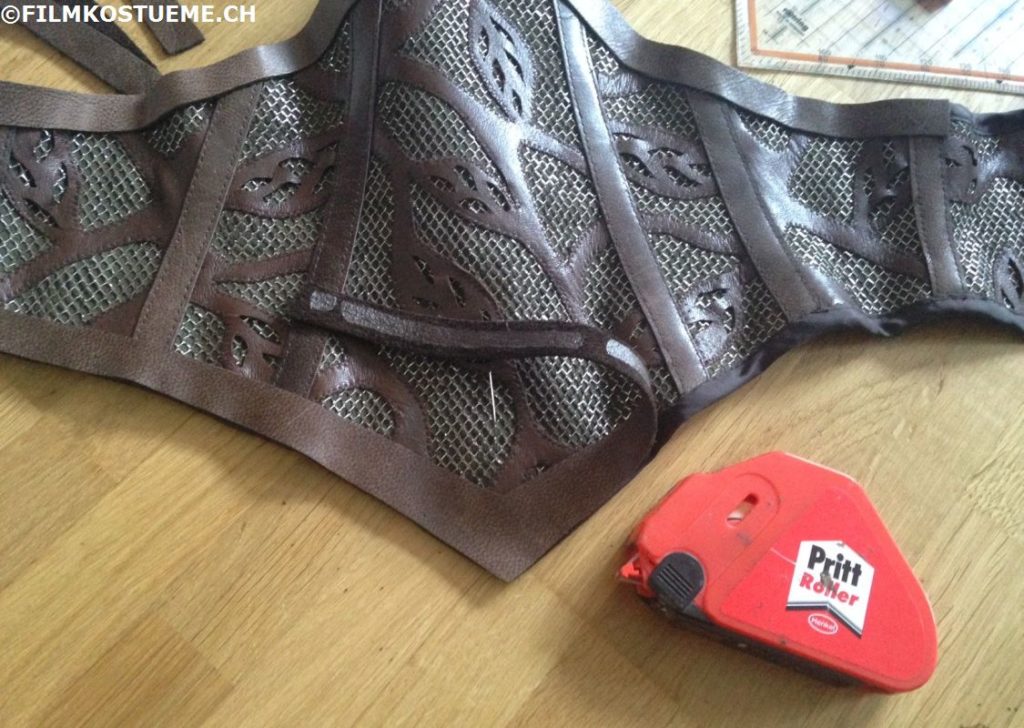
For the finish a added leather stripes to the bottom and top edges.
I glued them on first so they wouldn't slip while sewing them on.

I also added stripes around the bracer edges.


Corset Closure
Here you can see the leather piece in the back. I sewed it on from the back side first....


.......then wraped it around the edge and sewed it down from the right side. Doing the canals for the boning.


Inserting the boning. Did that to keep the lacing straight.

Last steps: Punching the holes for the eyelets and inserting them.


Bracers Closure
It took me one and a half Hobbit movies (extended edition) to finish my Mirkwood bracers ^^
Here's the link to my other Tauriel bracers, you might find it useful:

Then I painted them all with gold acryllic paint and deepend the creases with black.
Here are the hooks ready for baking. Did the same shape as for the Tauriel archer bracers. Only that for this bracers I needed some more than for the frist ones.... Used supersculpey and formed them around hooks.

And here are my finished bracers and I'm very proud of them. I love how they turned out <3
I attached some thin elastic cord to close the hooks.


Finished Bracers and Corset
And here are some pictures of the finished Mirkwood outfit with the tunic.


And that's it. I hope you liked my tutorial 🙂
Please feel free to share.
If you have any questions, leave me a comment or contact me.


