This is a Tutorial on how I made my Tauriel suede garb.
Pattern
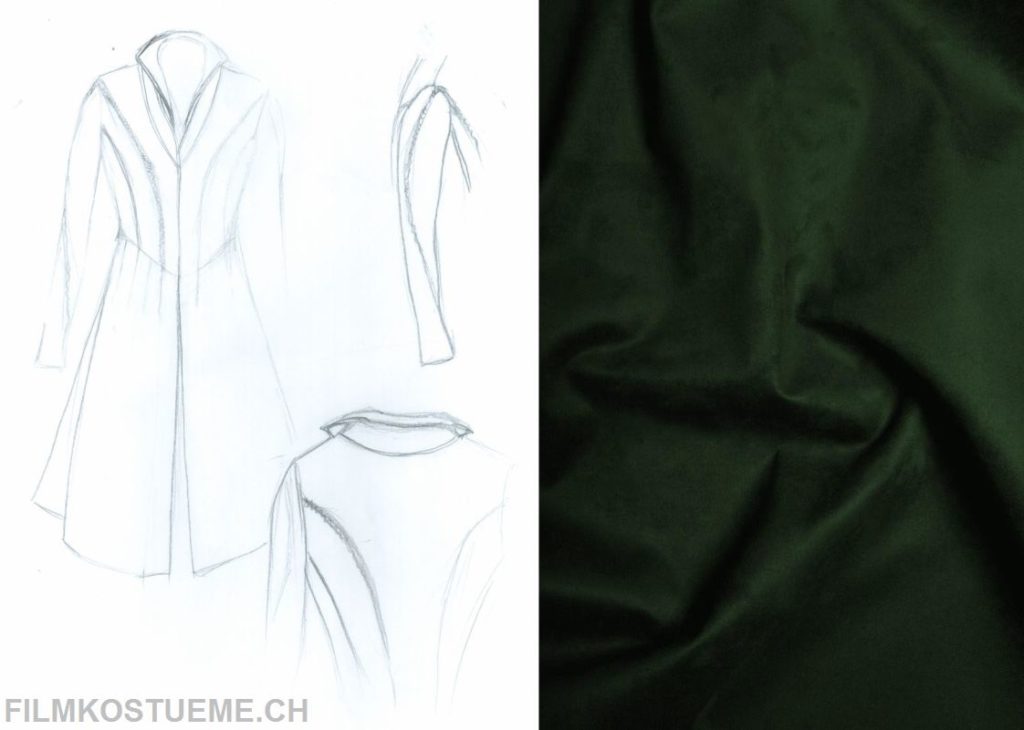
Before I began on the actual pattern, I studied lots of reference pictures to figure out the desine I wanted:

Then I pinned my basic pattern to the dressform an added the desired seam lines with a cord and marked them with a pen:


That's what the lines looked like on the basic pattern
"Next step was the actual designing of the pattern."

Front and back piece with collar.
The collar I designed only roughly, the shape will be changed later...


The sleeve with the curved seam
The skirt pattern, some what longer in the back.

Mockup
My advice: always make a mockup before you cut your real fabric, safes a lot of pain and money 😉
I wasn't 100% happy with my mockup and wanted to make some changes.


For me the skirt was far to wide (left side), so I pinned some of it together (right side).
I pinned the collar into the right shape, but I definately had to do another test round with it.
I liked the overall look of the upper collar, but wanted to change the middel part (green), make it narrower.
I had to "pin away" some of the width in the back of the skirt as well. During the whole pattern test process, I looked through tonnes of Tauriel pics again an spotted some new stuff, that I didn't noticed before...

....here you can see, the "over collar" ends pointy down the back.
Cut the suede fabric
I used about 2.5 meters of fabric, it was a close call, I advice to rader buy some more 😉

At first I cut the fabric only roughly and ironed on the interfacing. The material was a bit to thin to look like real leather.


Piping
What you need is bias strips (in this case I used lining fabric) and a cord in the desired thickness (it can also be just a normal cord)
Then sew the cord in to the bias strip.


I prefer to take two steps for sewing the tucks in, because it tends to slide. So at first at I fix it to one side. and then put the two pieces together. And tada, your finished 😉

Fishnet stitch trim
Has anyone used that fishnet stitch before? Well I hadn't untill this project, but I like it a lot and will probably use it again soon 😀
Here's my step by step:

This is the first step. I used wool yarn and normal thread (polyester)
Steps 2-4 are all the same, the pictures below show the progress of the 3 rows I did.
I advise to use a long enough thread for one row at the time. The net that starts to form should be loosely and only attached at the beginning and ending of a row.


Final step is attaching the net on another wool yarn and your finished. I love the way it turned out. It's exactly how I wanted it to look 🙂

Sewing the top
Basic to is sewn together in this pic. With the embroidered seams.
Below, with the "outer" collar (I have no idea how to call it..) and another tuck between the pieces.
The actual collar is still missing


And the finished "outer collar"
The collar
Just to be sure, I made another test collar 😉

Cutting, sewing together and finishing the collar. There's also a tuck between the two layers, as you can see in the third pic.


And the finished collar 🙂


Sleeves
The first fishnet-seam I did while the sleeve was still open, it's enough to have to do one seam while already closed ;P
Here the sleeve is almost done, only the lining is not yet attached.

And here completely done, with and without arm in it 😉 I was very happy with the result!


Skirt
Here I fixed the hem with the herringbone stitch, unseen from the right side. And attaching the lining to the hem.


Here are the finished skirt pieces "flat" on the ground (front and lining side)
I wasn't allowed to take a pic of "only" the back piece though 😉


And that's what the skirt looks on the dress form. I still have to sew the pices together...


Finished suede garb
Here are two pictures of the front closure. Later I used a ribbon for the lacing though, I just had this one at hand so I used it for a test.


Top and skirt part are just pinned together it these pictures. I actually never sewed them together, because I decided I wanted to be able to just use the top. I sewed some snaps and hooks to both parts to make the skirt attachable 🙂


That's it for Tauriels suede garb. I hope you found my tutorial helpful. Please feel free to share it.
If you have any question, leave me a comment.


Hi!
I just found your tutorial, it’s amazing!!!
I really wanted to make the archer dress from tauriel but I am a beginner in sewing… could you help me a bit with the patterns because I don’t understand everything…
thank you!!
Hi Maria,
thank you for your comment. I’m happy to hear you like my Tauriel 🙂
Do you have particular questions concerning the pattern?
Sarah
Hi Sarah !
I just wanted to thank you for all your publication, I’m working on my Tauriel costume and your post helped me a lot. I made the pattern using your example.
I’m currently working on the suede garb, and it looks so good that I’m thinking about making the travel cloak too !
Anyway, thank you for your work, it is amazing !
You are very welcome 🙂
Thank you for your lovely comment! It always makes me happy to hear, that my tutorials are of help to someone.
I would be happy to see your finished Tauriel. Maybe you can send me a picture on my facebook or insta account 😀
facebook.com/filmkostueme.ch
instagram.com/filmkostueme.ch
Good luck and have fun!
Sarah
Hello,
I just wanted to say that your costume is so amazing! It really looks like the one they used in the movies ^^
Since I also love sewing and am currently trying to make a cosplay crossover (a combination of Arwens grey cloak, Tauriels outfit and Daenerys grey outfit) I wanted to ask, which fabric you used for this costume and where did you buy it. I would love to hear from you, and congrats on the great cosplay,
Vicky
Hi Vicky, thank you so much! I’m happy you like my Tauriel costume 🙂
About the fabric I used. Unfortunately it is not available anymore. I’m very sorry!
I making the costume again for a commission at the moment and used another fabric. The green is not the same, but I must say, I like the new fabric even better!
I bought it from a Swiss online-shop, so I’m not sure, if the ship out of Switzerland. But here’s the link anyway: kreando.ch/kunstleder-nubuk-tannengruen/
If you’re interested, I have some WIP pics of my new Tauriel version on my ista account (in my stories/top line): instagram.com/filmkostueme.ch
Hope this is helpful, all the best, Sarah
Thanks so much for your answer and the links ^^
I already discovered your Instagram and I’m very happy about it! So much inspiration and creative vibes =)
Hi, This is absolutely amazing. I’m hoping to learn how to do this myself. What type of material did you use for this and the overcoat? Thanks
Merci beaucoup : beaucoup d’inspiration et une aide technique précieuse pour réaliser ma tenue de Tauriel !
Salutations du Valais central 🇨🇭!
de rien et beaucoup de plaisir à créer ton costume de Tauriel. Salutations du lac de Zurich <3 🙂