Season 7 of Game of Thrones is already like 2 month ago and now we have to wait FOREVER for season 8...
To make my wait more beareable I decided to make several of Danys dresses.
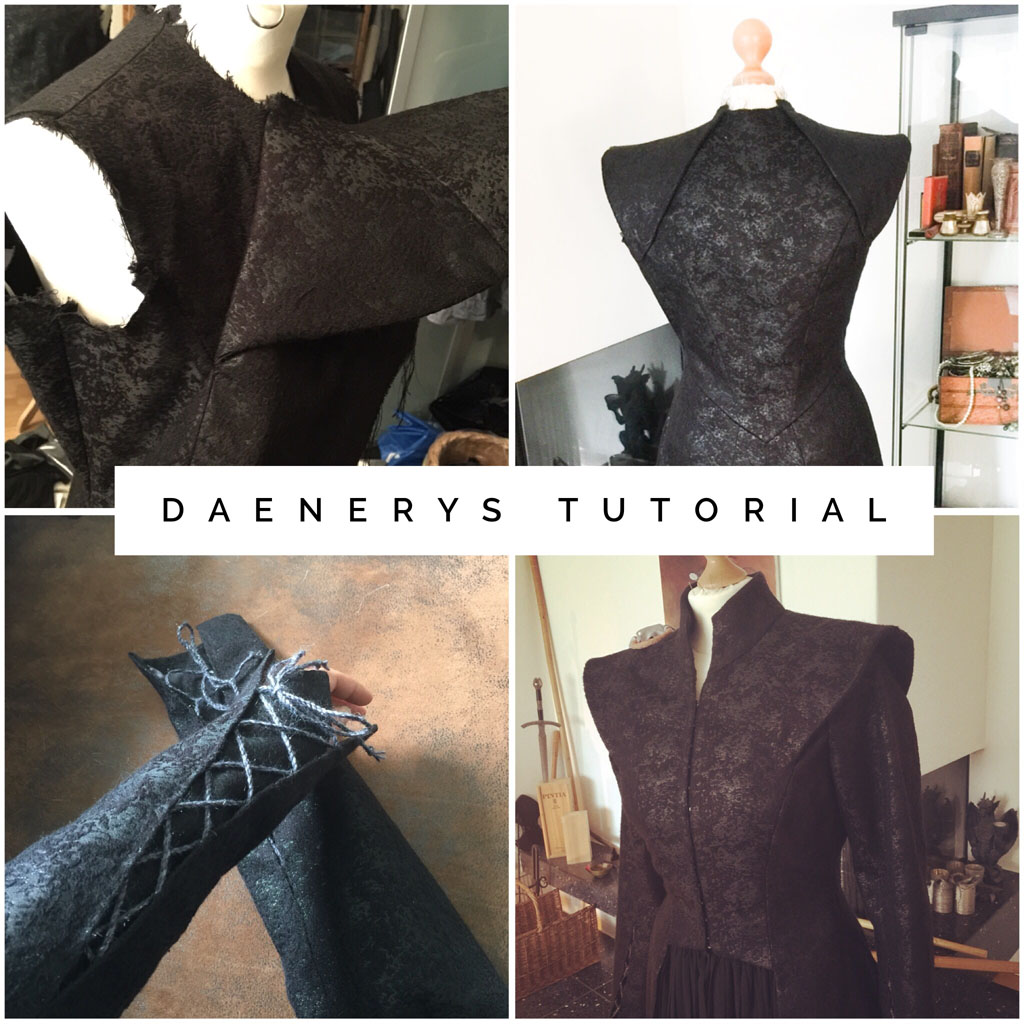
Starting with this lovely dress.
Here's a Tutorial on how I made Daenerys silver black season 7 dress.
Fabric and Pattern
I used used this gorgeous silvery black jacquarde fabric from cosplay-craft.fr/tissus.html

To be honest, the pattern on this dress is pretty complicated... It took me a while to figure it out.
Anyways I will show you my pattern and maybe it helps someone who is going through the same process 😉

Here's my front pattern. You can see I made a seam just under the breast in the side panel. This seam will continue in the back and and in a point in the center of the back.
The small piece on top of front-top-pattern belongs actually under this that piece. (more on that later on, when I come to that damn shoulder part... 😉 )


And here is my back pattern and also the back part of the shoulder part above the main pattern.
Below you see some closer looks on the pattern.


And last but not least, here's the sleeve 🙂
Mock up
As always: please do at least one mock up. Especially if it is a more complicated pattern.

All in all I was pretty happy with my mock up and didn't have to change much.
The shoulders where a bit to wide and I took i in a bit around the waist.


Cutting and Interfacing
At first I wanted to iron on interfacing to all the pieces. For one to give it more hold and second the fabric is fraying pretty much.
But as I only had thicker interfacing at hand and didn't want to wait, I used a fine fabric as interfacing for the skirt part.


I also added a corset style base to the top of the dress. More on it later.

Start sewing and shoulder part
At first I joined together the skirt part, the back of the top and the sleeves.
Then I sewed the corset base to the back, side (sorry don't have a picture of the side) and front/shoulder pieces (the cotton fabric I used in my mock up with rigilene bones to give it a more structured look)


As you can see I added boning right next to the front middle, one on the shoulder seam and one that goes all the way from the bottom to the back end of the shoulder wing.
I then joined together the side piece and that little front piece that will be hidden under the shoulder wing.
And then I connected the unfinished top to the skirt.


I only sewed the little front piece right to the point on which the shoulder part starts to curve out. So there is a little seam allowance left.
On to that shoulders 😉
I started with sewing the lining for the shoulder to the front/shoulder part. The front half of the lining stops exactly at the same point as the little hidden front piece.
I again sewed from the curing point and then continued around the edge in the back till the I reached the neck. And then I turned it to the right side (See second picture)


Then I sewed together the front piece to the side piece starting from the bottom to the curve point.
And then I joined the little front piece to lining of the shoulder.


Here you can see that little hidden seam and shoulder thingy from the inside.


I then hand stitched that seam to the cotton base of the top, so it would slip.


The back of the shoulder thingy I hand sewed to the back of the top.
And this is what the dress looked so far 🙂


Closure and lining
I'm very sorry, but I have literally forgotten to take pictures of this process. Well here's this one picture of the hook and eye band closure.
For the lining I used a dark grey satin fabric. The whole dress is lined with it. You can see the fabric when I rite to the sleeves next.
Collar and sleeves
This is how my collar looks like. I'm not going to lie, this was the hardest part of the dress for me. That's probably why I didn't take more pictures of it....
To sew the collar to the dress with all those thick layers... a nightmare. And it's also the part of the dress I like the least.


So lets get on to the sleeves quickly...
Danys sleeves are laced up at the forearms and under that lacing is a backing which ends in a point. Like on the pictures below.


But before I attached this tongue thingies. I sewed on some eyelets for the lacing......
...and then hand sewed the lining to the sleeves.

Only then did I hand sew the tongue things to the sleeves. I sewed it down until the point it gets smaller, so it will not slip to one side when I wear it.


And the sleeves are done. I twisted the cord myself, the yarn has some sparkly threads in it, which you can't see in the picture 😉
Then I sewed the sleeves to the dress.


Under corset and pleated skirt
I made this under bust corset to wear under the dress. You don't have to wear a corset underneath, but it gives you and the dress extra shape and hold.
I admit, I was a little lazy concerning the pleated skirt. I bought 2 skirts from amazone. That's the one I bought: pleated skirt
It doesn't look as neat as in the picture. But absolutely ok for that price!

I then took the two skirts apart and joined the the panels together. I used only 2 out of 3 from the second skirt. I did this to make it wider.

As it's a chiffon fabric and transparent it came with a lining, but only a very short one. I switched it with this light silvery lining fabric.

I think all in all it looks decent enough.
However there are a few minus points on the skirt:
First of all it's not a sun ray pleating like in the original and second it was a bit to short, which leads to the point that bothers me the most. I had to adjust the dress to fit the pleated skirt. I would have made it a few cm longer plus I also had to adjust the chevron part from the top.
I had to drag it down somewhat and I really hated that, because it changes the look 🙁
So if you can, get your fabric sun ray pleated or buy pleated fabric to make your own skirt/or even a dress. Emilia wears a high waisted dress with pleated skirt part. That way it won't slip down 😉
Well if you are smaler than me, the skirt could work just fine. (I'm 1.70m, if you were wondering 😉 )

Silver cloak
I used this silver dupion silk from
silknature.de/
I made mine 2.5 m long and about 42 cm wide. I just folded it over and sewed it together.
That's already all. I don't really have more about it to say. Well just maybe. If you find a dupion silk that is a bit rougher and not as plain as mine, that would be even better 😉
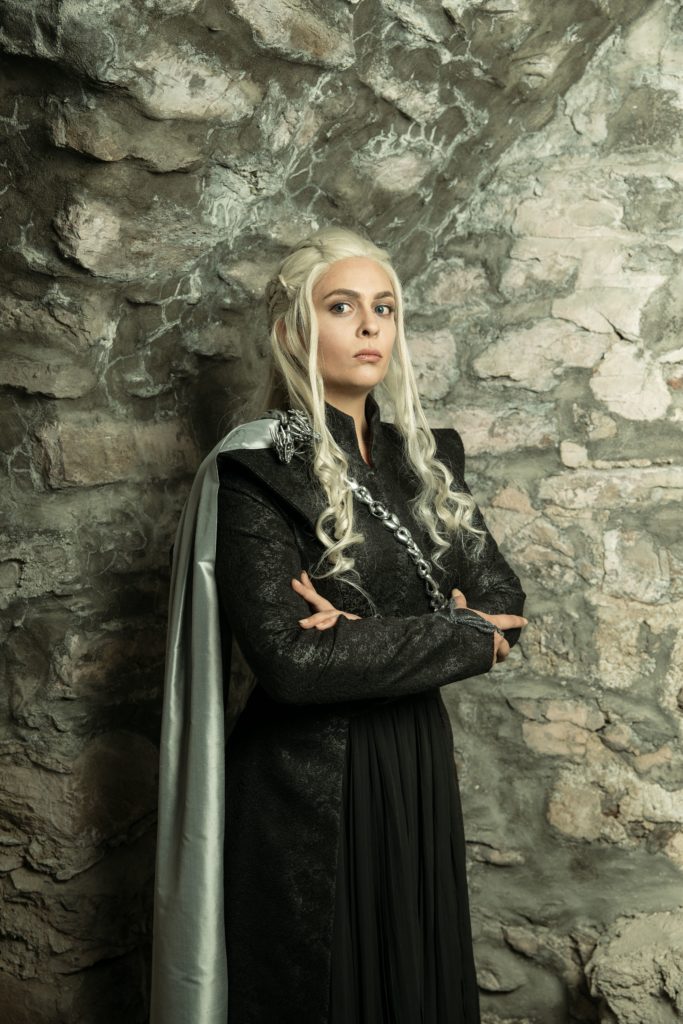
Finished Dress


That's it for Daenerys' silvery black dress. I hope you found my tutorial helpful. Please feel free to share it.
I also wrote a tutorial on how I made my dragon chain and brooch. If you're interested, you find it here
If you have any question, leave me a comment.


Thank you so much for sharing your tutorial! It helps a lot (:
Dear Susanne, thanks for your kind words 🙂 I’m glad the tutorial helpt you out 🙂
This is so beautiful ! Thank you for your tutorial it helps a lot! I will have to find a pattern or trying to do mine … But the shoulders are quite scary to pattern :/
Hi and thank you so much 🙂 I’m happy my tutorial helps you out! yes I know the shoulders are a bit scary, but just try it out and make more then one mock up if needed. good luck 🙂
Thank you so much for this tutorial! I was wondering, the link for the fabric doesn’t work anymore. Is there any other place to get fabric like that?
Your welcome 🙂
I’m very sorry, but I don’t know of another shop that has that fabric. Maybe you can ask the shop directly if they are going to have it back, or if they can tell your where the got it from.
It’s a cosplay shop form France and if I remember correctly they got the fabric from a fabric store in France.
Good luck!
Sarah
Love this, very helpful! Do you remember how much fabric you needed to make this?
Dear Lauren, thank you. I’m glad you find it helpful. I think I used a bit over 3 meters for mine 😉